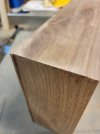
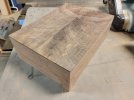
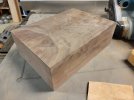
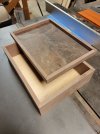
Make a wooden box

Southeast Traders Apparel Swag Store

dial1911

Waiting for the flash
Site Supporter
Jul 15, 2015
7,331
27,066
113
Anywhere but here
southeastoutdoors.boards.net
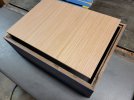
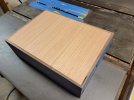
So, there's been some interest in a "how to" type thread on making these little boxes I've been posting pictures of... here we go!

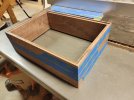
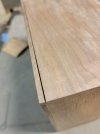
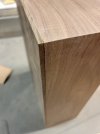
Example box-
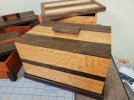
20210711_170621.jpg
First off, I could make a plan before I start (and I recommend you do that). But I've been just cutting wood on the fly with no real dimensions to go by. I know i generally want a box with finished outer dimensions about 8"x11"x3" or 4" deep. The example above was more like 6" deep.

So... a word on wood... oak is a great one to start with. The example box above is quarter sawn oak (has a pronounced grain pattern compared to plain sawn) and walnut. I'm going to describe how i cut down 1" thick boards to make thinner wood for this box. You can definitely start with wood that's already the right thickness. I'm cheap and i have thick boards, so i cut them down. I can probably pay for the bandsaw with about 20 years of cutting down thicker boards.

Anyway, you can use cheap wood. Hell, you can use a pallet of you want. I like to use better grades of (not pine or poplar) better wood because I'm going to spend hours working on this thing and want better results.

Supplies... i like Titebond III wood glue. I hate cheap sandpaper. Usually stick to 3M garnet or other wood working grade sandpaper. I start at 120 grit usually and end with 220 grit. Sometimes 80 grit to start if there are really bad places.
 
Last edited:

dial1911

Waiting for the flash
Site Supporter
Jul 15, 2015
7,331
27,066
113
Anywhere but here
southeastoutdoors.boards.net
I have a good bit of walnut right now, so i guess that's what I'm going to use. I try to work in batches to save time, so my wood prep pictures have some other stuff getting worked down with the walnut. Will probably work some oak into this box eventually because i have some left over from the last batch.

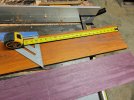
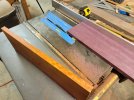
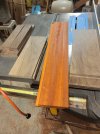
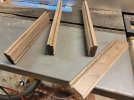
So.... step 1- cut down to length and true up both edges on the tablesaw. Technically, i should start by truing one edge on the jointer, but my jointer is ancient and has no safeguards (and it sounds like an airplane engine starting up). And I'm slightly afraid of that machine.

20210725_155243.jpg 20210725_155814.jpg

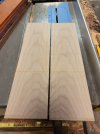
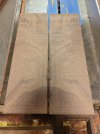
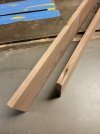
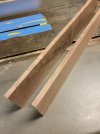
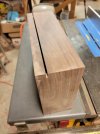
Step 2- resaw on the bandsaw. This makes my approximately 1" thick boards (some are 3/4") half as thick... except i always miss the middle and have a thick side and a thin side. Mr. Thickness Planer eats those mistakes for me later.

20210725_161552.jpg 20210725_170313.jpg

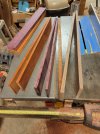
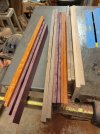
At this point, i have a stack of thinner boards that are very rough on one side.
 
Last edited:

dial1911

Waiting for the flash
Site Supporter
Jul 15, 2015
7,331
27,066
113
Anywhere but here
southeastoutdoors.boards.net
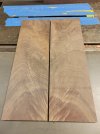
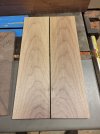
I should have mentioned "book matched pieces"... this is the idea that you can split a board in half and have a matched grain pattern on the two sides. Example right off the bandsaw-
20210725_163453.jpg 20210725_163236.jpg

I like using matched pieces like this for the box lids. I really wish they stayed such a great match... truth is that you have to plane them to make them smooth and even. This removes wood and the grain is no longer a perfect match... it's close, but not nearly as good as the pictures above.

After planing-
20210726_174744.jpg
20210726_174828.jpg

I'm not aware of places you can buy book matched pieces.... somebody probably sells them at a premium. The only way i know of getting them is to make it. Not difficult, but requires a couple machines... or perhaps a shit ton of effort and hand tools.
 
Last edited:
dial1911

Waiting for the flash
Site Supporter
Jul 15, 2015
7,331
27,066
113
Anywhere but here
southeastoutdoors.boards.net
Next, we go over to the thickness planer and spend about 40 minutes feeding wood through it. Eventually we get nice, smooth boards that are all the same thickness.

Now, these will not be perfect. No matter how hard I try and how "perfectly flat" the wood appears to be... i get snipe. This is a deeper cut on the first ~2" of the board. There are things you can do to minimize it, but I've never been able to completely eliminate it.

So, after planing, I use a hand held belt sander to smooth out any snipe or tear out (figured wood, that is to say "cool wood grain", gets little chunks ripped out during planing and sometimes cutting). You can either smooth it out now, or try to build up layers of polyurethane later to fill them in (but you can still see them).

Edit... that's not quite accurate. Since I'm joining the two pieces to make a lid, I'm going to wait and sand (maybe plane, depends on how much wood has to come off to be flat) after the two pieces are glued.

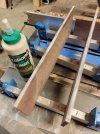
So... gluing... I always wet both faces with glue. Thin layer, evenly coated. If there's a lot of extra glue, you're going to have to deal with it later.

20210726_175559.jpg
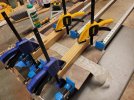
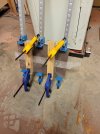
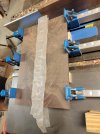
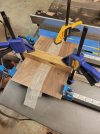
So... use a top and bottom board (just straight scrap wood) with clamps to hold the two pieces flush with each other. You're going to have to sand them flat later, so the closer the better.

20210726_175940.jpg

Wax paper will keep you from gluing the scrap boards to your project... I recommend it. Make sure there aren't any holes in the wax paper if you reuse it like I do.

Then just put it out of the way for a couple hours (overnight is much better).

20210726_180011.jpg

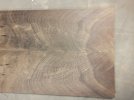
Finally after a little sanding, i think I'm going to use this for the top surface.

20210726_211344.jpg
 

Attachments

  • 20210726_175703.jpg
    20210726_175703.jpg
    309.2 KB · Views: 1
Last edited:

dial1911

Waiting for the flash
Site Supporter
Jul 15, 2015
7,331
27,066
113
Anywhere but here
southeastoutdoors.boards.net
Made the top and cut the box sides today.

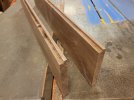
The sides... I cut notches on the top and bottom of the sides for the bottom and top. The bottom is just cheap 1/4 plywood... I should use a better material. I did have to check the wood for defects and make sure the bad spots are on the bottom or inside. Some bad spots-
20210726_180047.jpg

The other edge of the bad spots looked good-
20210726_180102.jpg

Here are the notches after cutting on the tablesaw-
20210726_180635.jpg
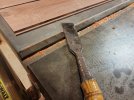
They needed a little hand clean up with a chisel-

20210726_180942.jpg

And fitting up the plywood bottom to make sure the notch was ok-
20210726_181722.jpg

Next the sides needed to be mitered... i wish i had good advice or a trick for tight mitered corners... i guess just be very precise and get in some practice.

20210726_203908.jpg
 
Last edited:

dial1911

Waiting for the flash
Site Supporter
Jul 15, 2015
7,331
27,066
113
Anywhere but here
southeastoutdoors.boards.net
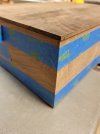
Here's one time that s youtube trick worked... painter's tape will (very temporarily) hold the box sides together so you can measure the bottom.
20210726_204251.jpg

Note that this is normally a crappy way to make a box bottom. You really want a mechanical connection. That is, move the plywood up about 1/4" so it is locked into a groove, not just glued to the box bottom.

In this case, it's ok because the bottom trim will have a corner cut to lock in the plywood (will get to that later). And this box was already kind of shallow and i didn't want to lose any more depth.

So, i cut the plywood a little big then trimmed it down to fit. I find this easier than trying to nail it on the first try.

20210726_205144.jpg 20210726_205123.jpg
 
Last edited:

dial1911

Waiting for the flash
Site Supporter
Jul 15, 2015
7,331
27,066
113
Anywhere but here
southeastoutdoors.boards.net
Bunch of boring sanding today. Also cut the lid down to size and grooved the edges. Details to follow...

So... the box top/lid. First operation was to cut it down to size. I left a very slight overhang on all sides. This is so after the glue dries, i can sand the edges dead nuts flush with the sides of the box (note- that same sanding step will fix any overhang on the mitered corners of the box sides too). So, i grooved the bottom edges of the top to lock into the grooves cut in the sides on the tablesaw. There are better tools to use (like a router table) but i chose the difficult way and cleaned up the cuts with a chisel.

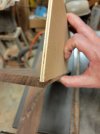
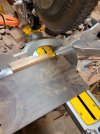
Side note- put a block of scrap wood behind your good piece to prevent tear out on the good piece- shown in miter saw-
20210727_195219.jpg

This is the grooves cut into the bottom of the box top-
20210727_202027.jpg

And the overhang, to be sanded down later after the glue dries-

20210727_202059.jpg


Then glue the mitered corners together, glue in the bottom and wait for tomorrow afternoon to glue on the top. There's a chance I'll have to trim the top grooves more to fit. It was a little too tight.
 
Last edited:
dial1911

Waiting for the flash
Site Supporter
Jul 15, 2015
7,331
27,066
113
Anywhere but here
southeastoutdoors.boards.net
Bro this is insane. So many details, so many skills

Thanks! It's mostly ok, but the gaps haunt me. One day i will make a nearly perfect box. And I'll quit. I won't be quitting any time soon.

It's like the 5 minute mile...

I'd be happy to fill in any gaps in the instructions. I left out a lot of stuff because the internet likes shorter explanations.

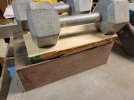
I could have done several things better- like using clamps instead of weights on the box lid glue up.... that would have eliminated 50% of the gaps i see.
 

dial1911

Waiting for the flash
Site Supporter
Jul 15, 2015
7,331
27,066
113
Anywhere but here
southeastoutdoors.boards.net
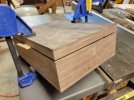
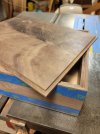
Finally sliced the top off the box. The inside hasn't seen daylight since i glued it up.

To do this, make a cut asking each long side. Then clamp with spacers in the saw cut (aka saw kerf). Then you can cut the last 2 sides.

First 2 cuts-
20210730_210052.jpg

Second cut after clamping-
20210730_210241.jpg

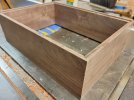
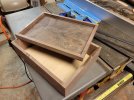
Then you have a lid exactly the same size as the box bottom-
20210730_210314.jpg

Then after sanding off all the saw burns, you have this-

20210730_213033.jpg